之前有搞过相机组件,如今也遇到了需求,顺便记录一下。
主要分为以下三步:
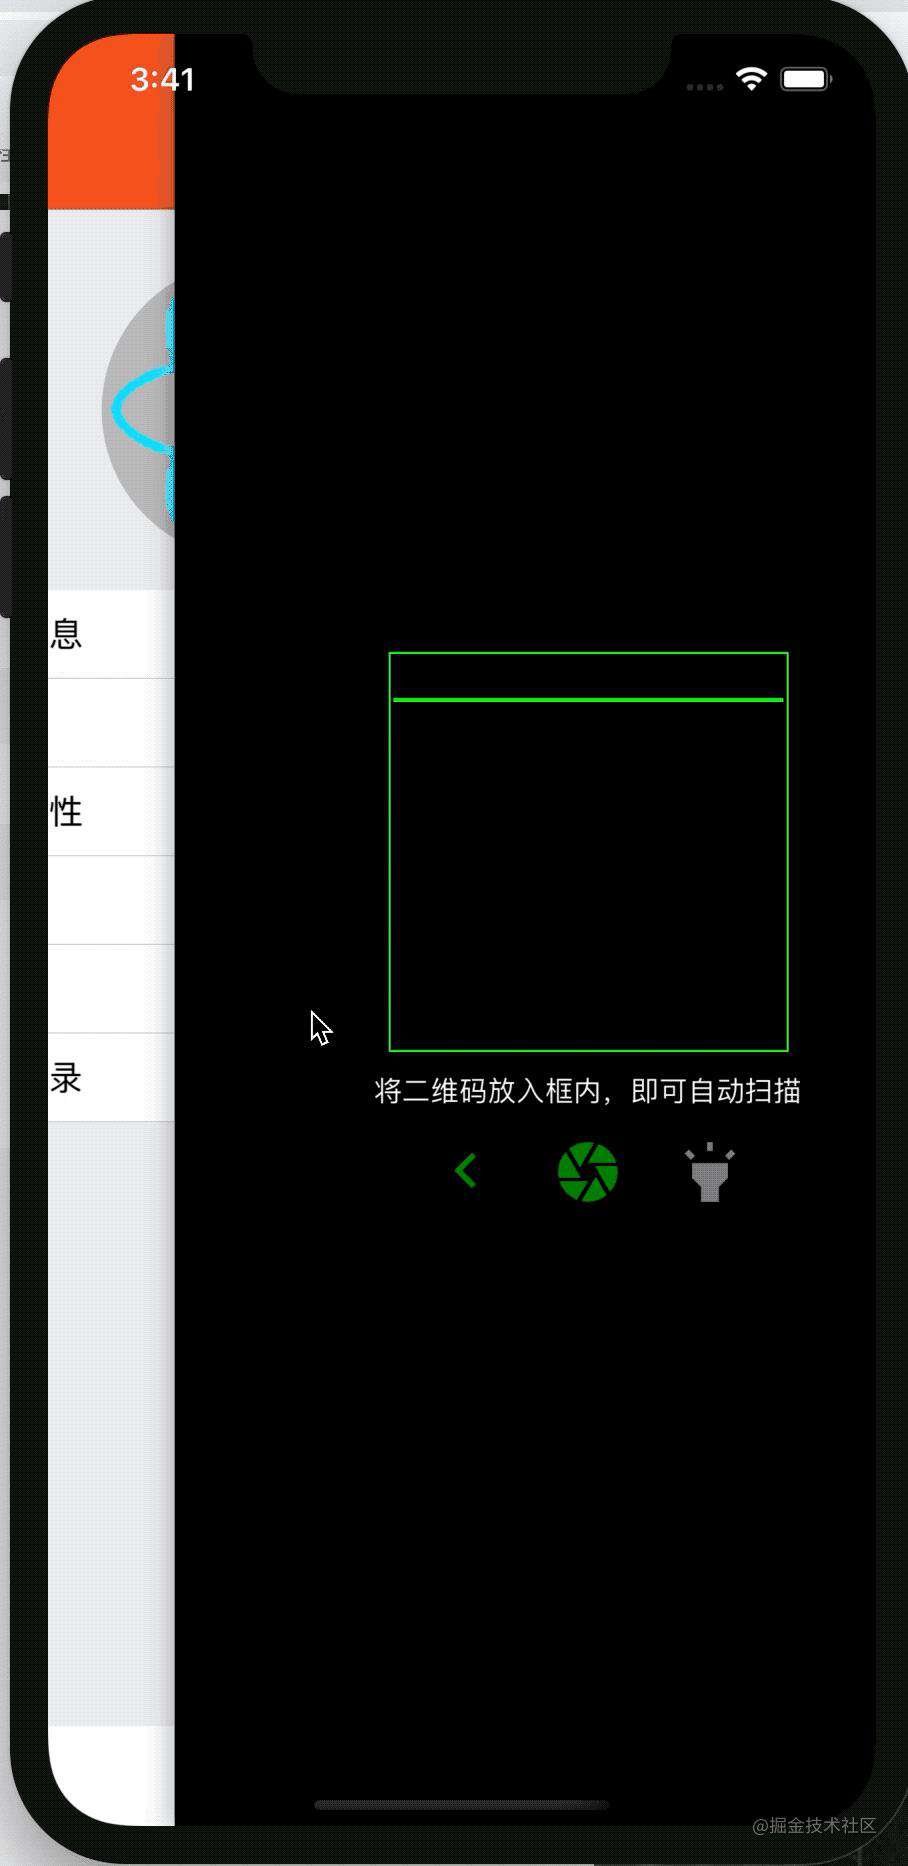
先上最终实现效果图:
一,版本介绍
以下是项目中使用的版本信息:
"react": "16.8.6",
"react-native": "0.60.5",
"react-native-camera": "^3.8.0"
想实现的功能是,可以扫描二维码,同时下方有按钮可以拍照及打开闪光灯。
二,安装使用
在 React-Native 0.60之后,安装使用非常的简单,而且不需要 link 。
1,首先,在项目根目录下执行 npm 安装命令,如下:
npm install react-native-camera@3.8.0
2,然后 ,需要 cd 进入 iOS 目录,执行 pod install,自动安装 iOS 端所需依赖。
3,需要在 iOS 的 Info.plist 中配置相机与麦克风权限,在安卓的 AndroidManifest.xml 中配置权限,如下图:
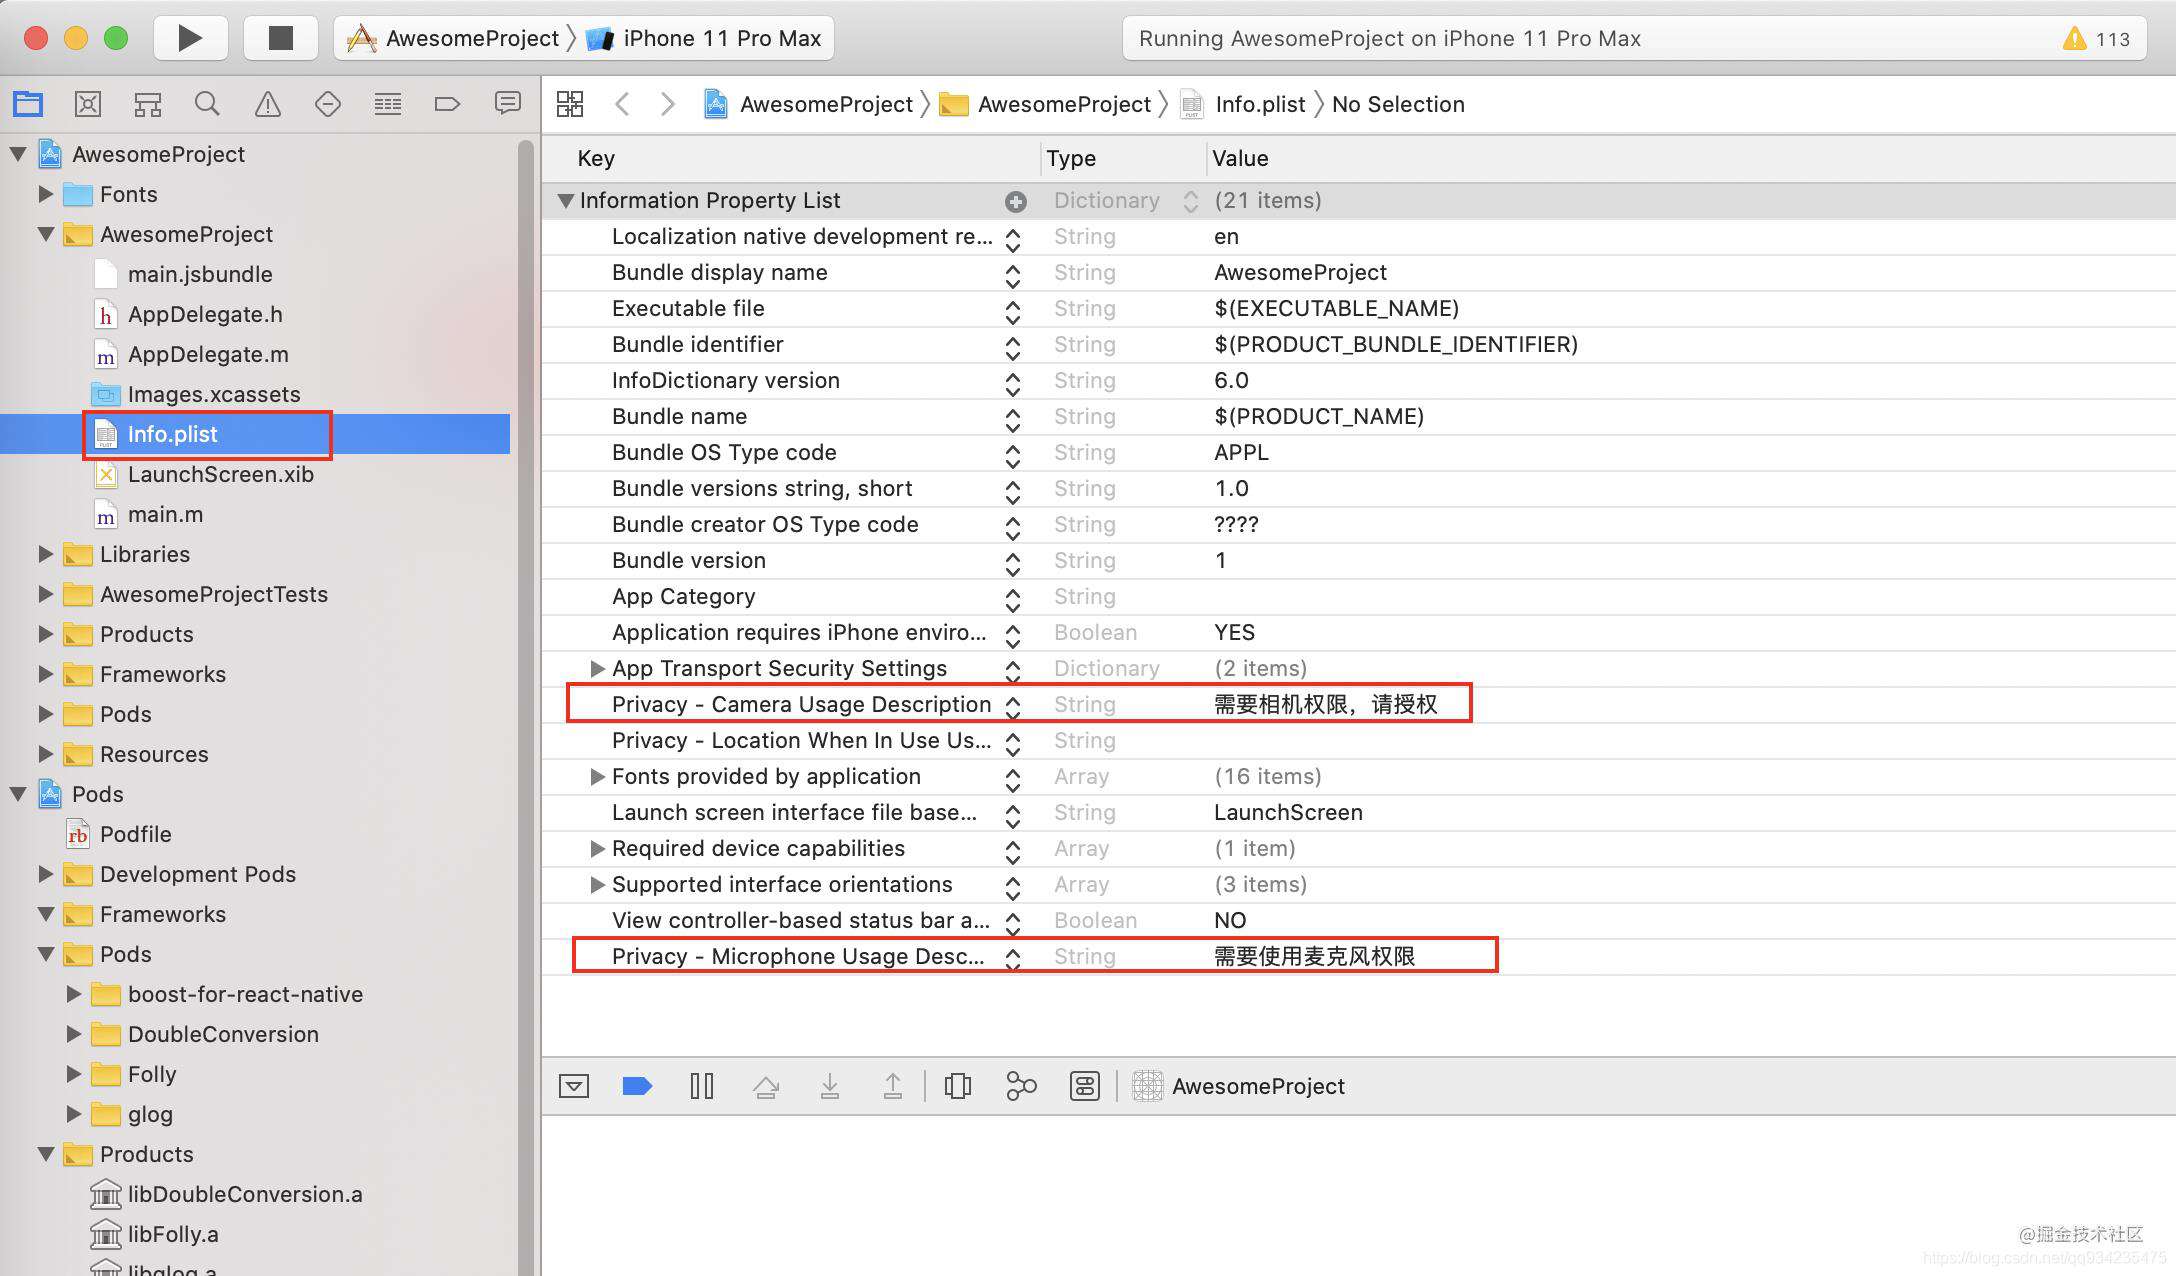
iOS 权限配置
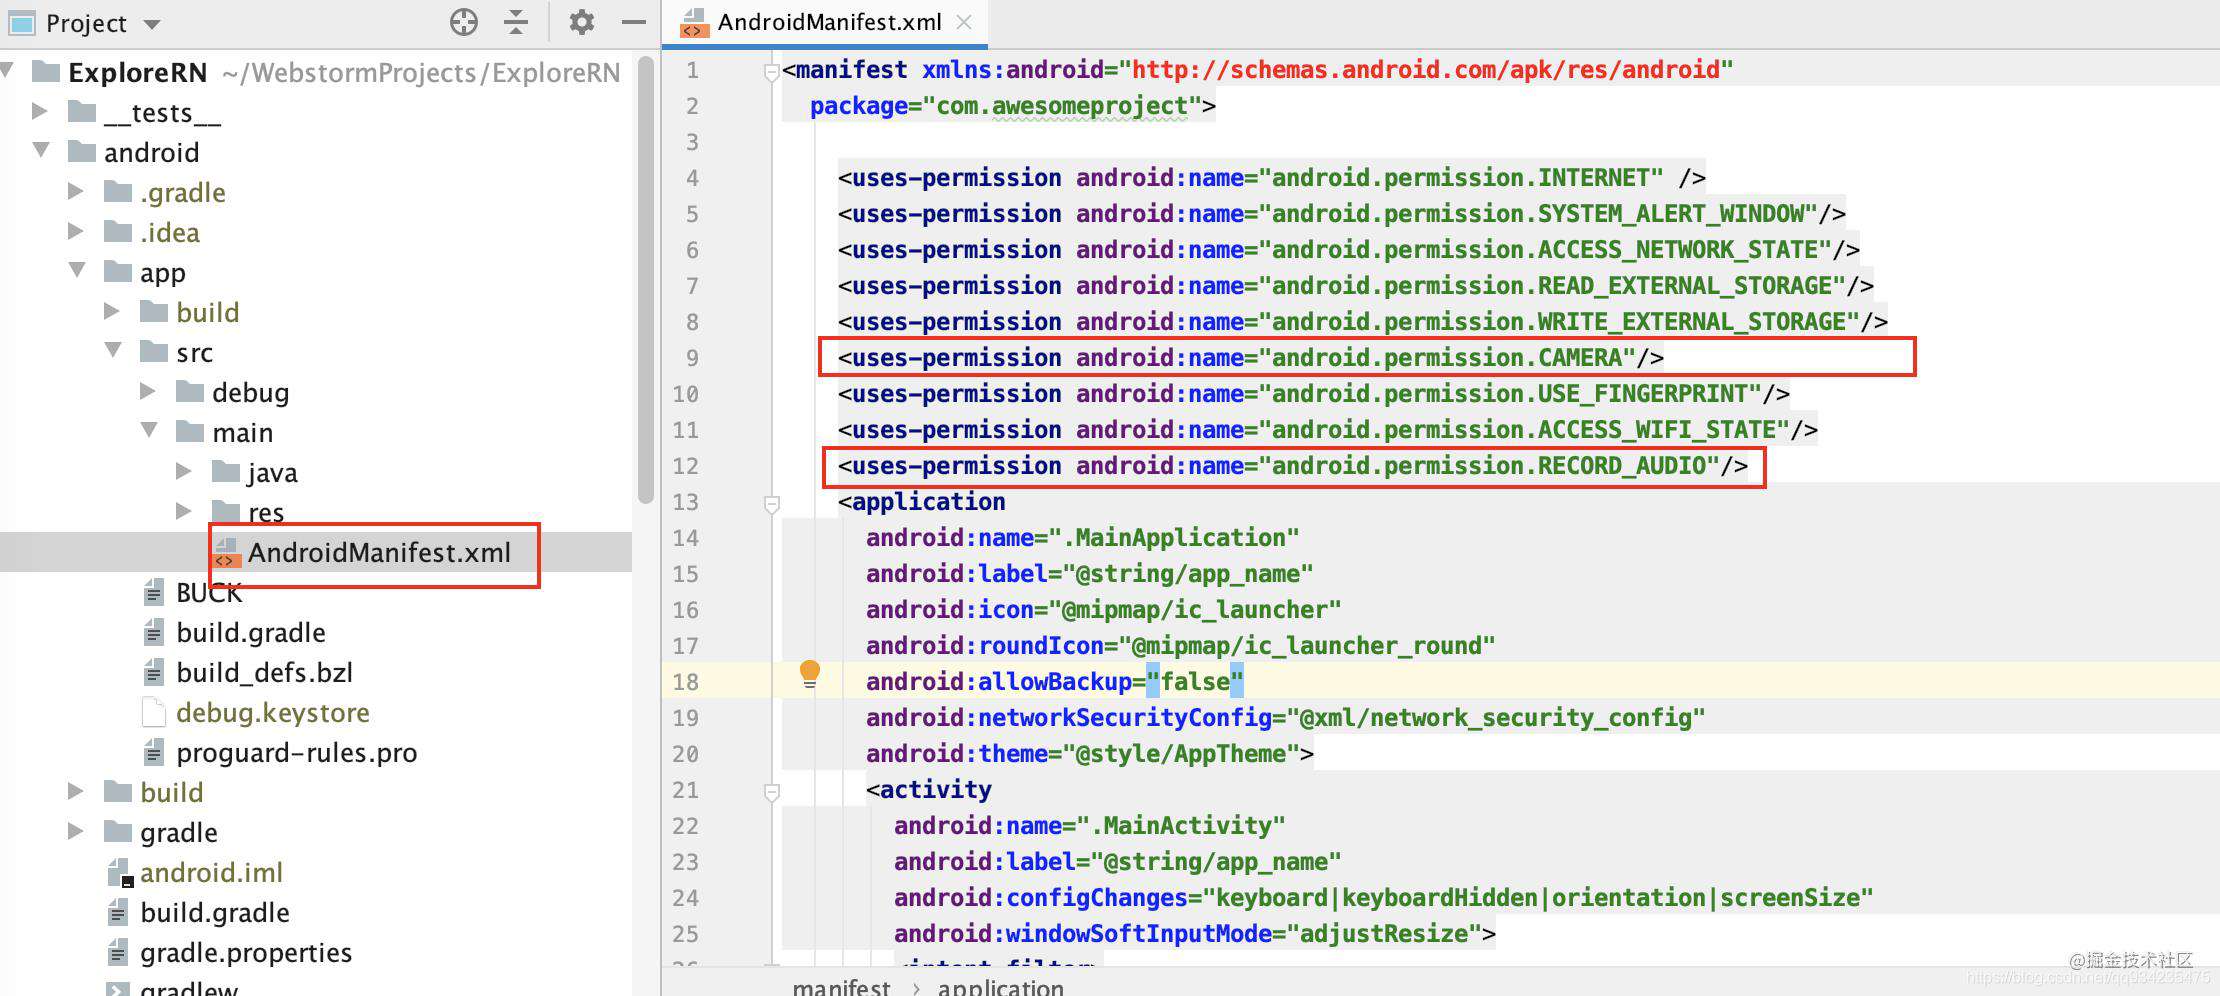
android 权限配置
// android 添加至 AndroidManifest.xml 中
    <uses-permission android:name="android.permission.RECORD_AUDIO"/>
    <uses-permission android:name="android.permission.CAMERA"/>

// iOS 到 info.plist 中选择如下
    Privacy - Microphone Usage Description
    Privacy - Camera Usage Description
4,在 android/app/build.gradle 中增加如下配置:
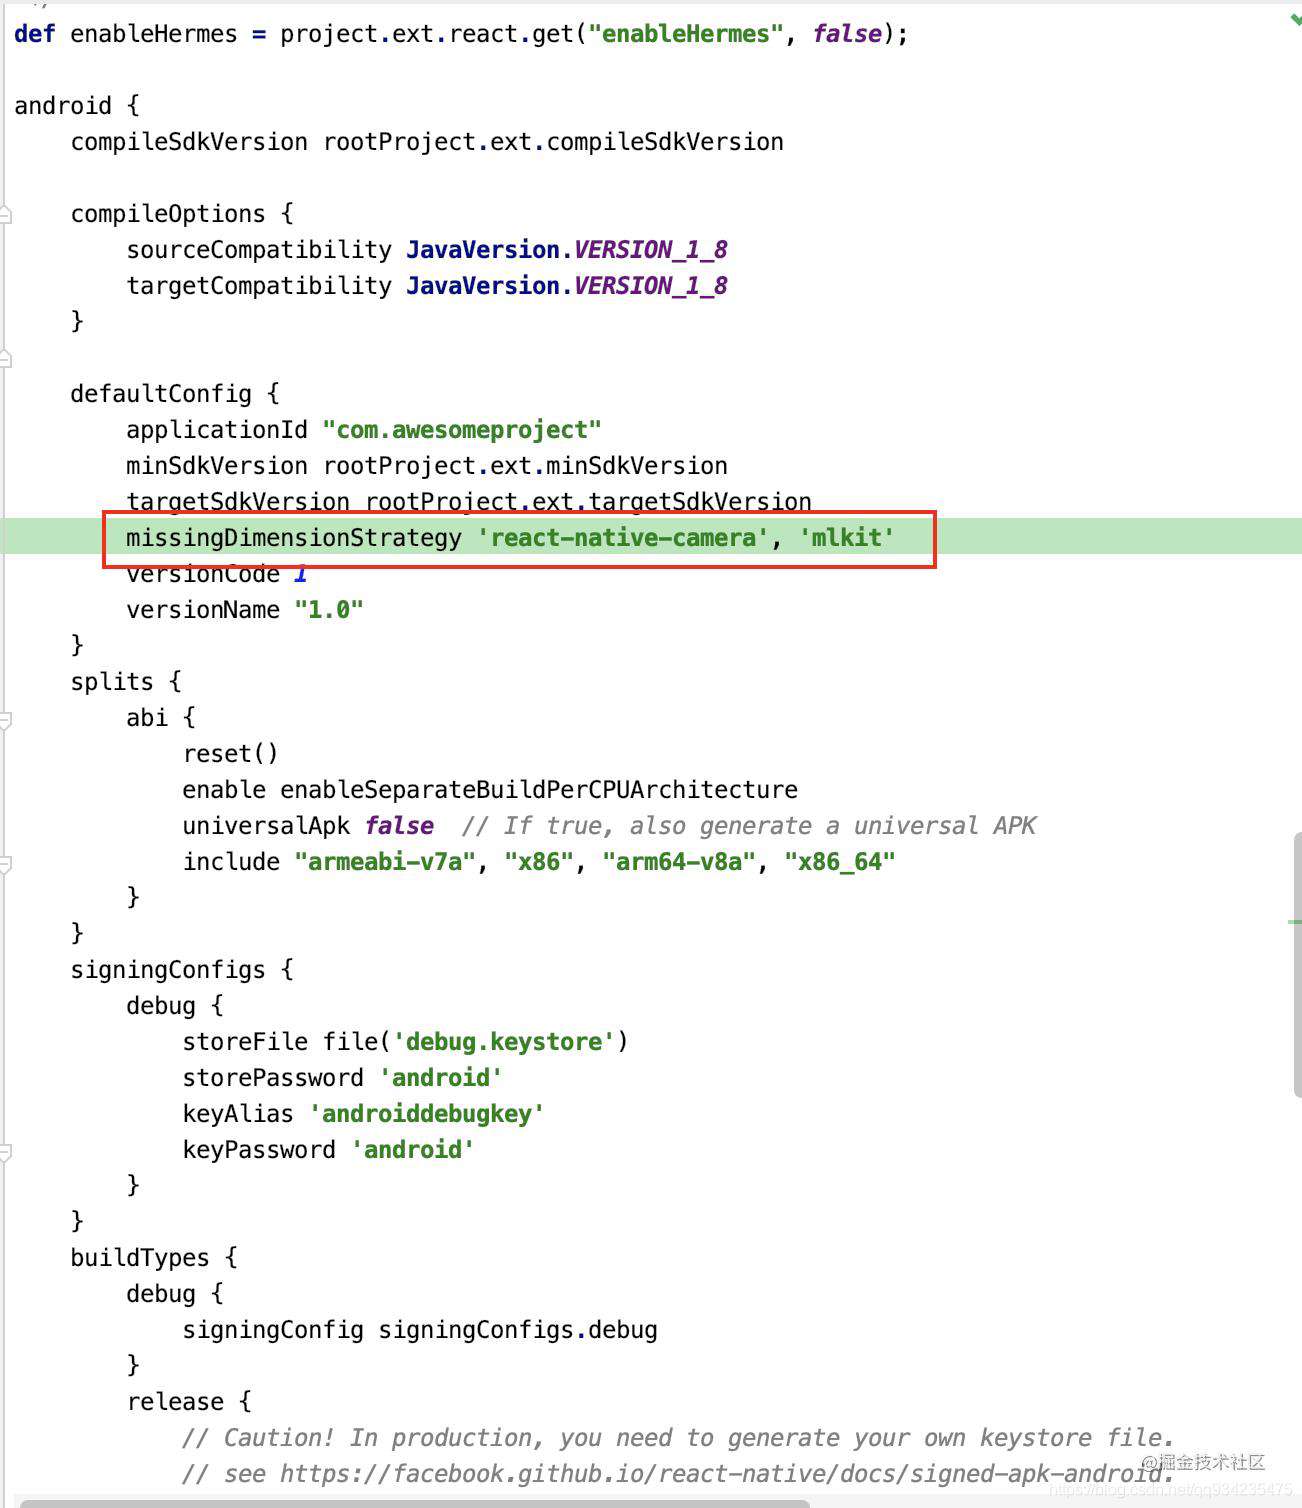
android build.gradle 配置
三,界面实现
界面如下,包含返回、拍照及闪光灯(PS:由于模拟器,没有摄像头故是黑的)。

扫一扫界面
拍照或识别到二维码后,跳转到结果页面:

结果扫描页面
具体代码如下:
/**
 * Created by supervons on 2019/10/20.
 * 扫一扫及拍照页面
 * explore page
 */
import React, { Component } from 'react';
import {
  StyleSheet,
  Text,
  TouchableOpacity,
  View,
  Animated,
  Easing
} from 'react-native';
import { RNCamera } from 'react-native-camera';
import {Icon, IconType} from 'react-native-elements';
export default class Scanner extends Component {
  constructor(props) {
    super(props);
    this.state = {
      moveAnim: new Animated.Value(0),
      FlashMode: false,
      showCamera: true
    };
    this.isBarcodeRead = false;
  }

  // 去掉导航条设置,全屏扫描
  static navigationOptions = {
    header: null
  };

  componentDidMount() {
    this.startAnimation();
    // 监听当结果页返回时,重新启动相机监听扫描事件
    this.props.navigation.addListener("didFocus", () =>
        this.setState({showCamera : true})
    )
  }

  startAnimation = () => {
    this.state.moveAnim.setValue(-200);
    Animated.timing(this.state.moveAnim, {
      toValue: 0,
      duration: 1500,
      easing: Easing.linear
    }).start(() => this.startAnimation());
  };

  // 扫描事件
  onBarCodeRead = result => {
    if (!this.isBarcodeRead) {
      this.isBarcodeRead = true;
      // 卸载扫一扫组件,否则还会持续扫描
      this.setState({showCamera: false})
      this.props.navigation.navigate('ScannerResult', {
        imageUri: null,
        scannerResult: JSON.stringify(result)
      });
    }
  };

  // 拍照事件
  takePicture = async () => {
    if (this.camera) {
      const options = { quality: 0.5, base64: true };
      const data = await this.camera.takePictureAsync(options);
      this.setState({showCamera: false})
      this.props.navigation.push('ScannerResult', {
        imageUri: data.uri,
        scannerResult: ''
      });
    }
  };

  // 闪光灯开关
  _changeFlashMode() {
    this.setState({
      FlashMode: !this.state.FlashMode
    });
  }

  render() {
    return (
      <View style={styles.container}>
        {this.state.showCamera ? (
          <RNCamera
            ref={ref => {
              this.camera = ref;
            }}
            style={styles.preview}
            type={RNCamera.Constants.Type.back}
            flashMode={this.state.FlashMode ? 1 : 0}
            onBarCodeRead={this.onBarCodeRead}
          >
            <View style={styles.rectangleContainer}>
              <View style={styles.rectangle} />
              <Animated.View
                style={[
                  styles.border,
                  { transform: [{ translateY: this.state.moveAnim }] }
                ]}
              />
              <Text style={styles.rectangleText}>
                将二维码放入框内,即可自动扫描
              </Text>
              <View style={{ flexDirection: 'row', marginTop: 15 }}>
                <TouchableOpacity
                  onPress={()=>this.props.navigation.goBack()}
                >
                  <Icon name='keyboard-arrow-left' size={36} color={'green'}/>
                </TouchableOpacity>
                <TouchableOpacity
                  onPress={this.takePicture.bind(this)}
                  style={{marginLeft: 25}}
                >
                  <Icon name='camera' size={36} color={'green'}/>
                </TouchableOpacity>
                <TouchableOpacity
                  onPress={this._changeFlashMode.bind(this)}
                  style={{marginLeft: 25}}
                >
                  <Icon name='highlight' size={36} color={this.state.FlashMode ? 'green' : 'gray'}/>
                </TouchableOpacity>
              </View>
            </View>
          </RNCamera>
        ) : (
          <View />
        )}
      </View>
    );
  }
}
CSS如下
  text: {
    color: '#fff',
    fontSize: 30,
    fontWeight: 'bold'
  },
  container: {
    flex: 1,
    flexDirection: 'column'
  },
  preview: {
    flex: 1,
    justifyContent: 'flex-end',
    alignItems: 'center'
  },
  rectangleContainer: {
    flex: 1,
    alignItems: 'center',
    justifyContent: 'center',
    backgroundColor: 'transparent'
  },
  rectangle: {
    height: 200,
    width: 200,
    borderWidth: 1,
    borderColor: '#00FF00',
    backgroundColor: 'transparent'
  },
  rectangleText: {
    flex: 0,
    color: '#fff',
    marginTop: 10
  },
  border: {
    flex: 0,
    width: 195,
    height: 2,
    backgroundColor: '#00FF00'
  }
git项目地址:github.com/supervons/E…
常见问题FAQ
- 免费下载或者VIP会员专享资源能否直接商用?
- 本站所有资源版权均属于原作者所有,这里所提供资源均只能用于参考学习用,请勿直接商用。若由于商用引起版权纠纷,一切责任均由使用者承担。更多说明请参考 VIP介绍。
- 提示下载完但解压或打开不了?
- 找不到素材资源介绍文章里的示例图片?
- 模板不会安装或需要功能定制以及二次开发?


发表评论
还没有评论,快来抢沙发吧!