由于最近在公司写一些webpack的插件,用于处理一下工作上面的代码,所以研究了一下webpack的打包原理。本文就是总结一下webpack的基本实现的原理,由于公司内部使用webpack 4.35.0, 所以基于这个版本对webpack进行简单的了解,之后升级为webpack5之后再进行分析。
从下面几个方向分析webpack的原理
- webpack的主要用途
- webpack打包后的主要内容分析
- 实现简单的webpack
- 编写一些简单的
loader - 编写一些简单的
插件
webpack的主要用途
当程序功能比较复杂的时候,有时候我们会对代码进行模块的抽离,方便我们进行模块的管理,比如我们有一个下面的代码:
// 目录结构
/*
test
├── a.js
├── b.js
├── index.html
└── index.html
*/
// a.js
import b from './b.js'
export default 'a' + b
// b.js
export default 'b'
// index.js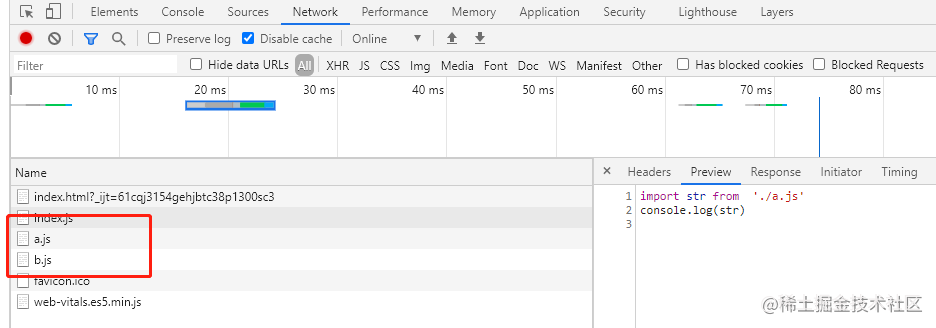
import str from './a.js'
console.log(str)
// index.html
<body>
<script type="module" src="index.js"></script>
</body>
就是这个简单的一个Es6的模块引用,浏览器会发送多个请求,这对于同一个域名下的请求限制,如果功能复杂的话,会出现请求堵塞等影响性能的情况。
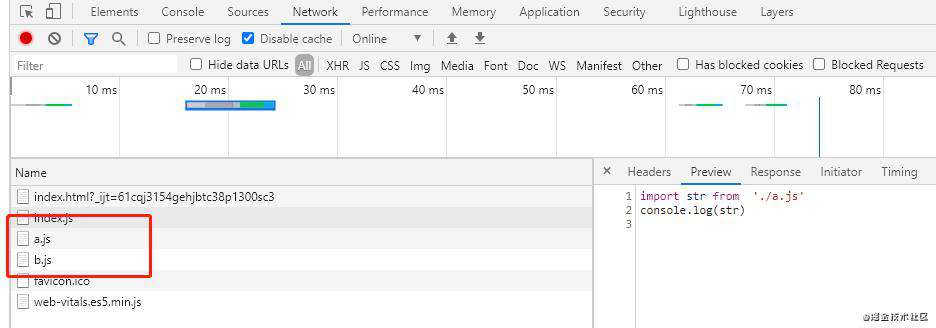
基于这一个例子,总结我们使用webpack的主要用途
- 对于模块的引用进行打包处理,减少文件的请求
- 当我们使用的第三方模块不长期更新的时候,可以利用webpack进行模块分离,然后缓存起来,减少用户请求
- 对于不同的资源和代码实现转换和压缩。 比如 TypeScript 转换成 Javascript, Stylus 转换成 CSS
- 文件的优化,可以对一些资源进行压缩和合并
- 代码分割, 提取多个页面的公共代码、提取首屏不需要执行部分的代码让其异步加载。
webpack打包后的主要内容分析
## 目录结构
test/src
├── a.js
├── base
	├── b.js
└── index.js

// a.js
let b = require('./base/b.js');
module.exports = 'a' + b;

// b.js
module.exports = 'b';

// index.js
let str = require('./a.js');
console.log(str)

// webpack.config.js
const path = require("path");
module.exports = {
  mode: 'development',
  entry: "./src/index.js",
  output: {
    filename: "bundle.js",
    path: path.resolve(__dirname, "dist"),
  }
};
当我们使用npx webpack的时候,会在dist目录下生成build.js, 我们去掉一些注释和一些目前不关心的内容,大致内容就是这样
(function (modules) { // webpackBootstrap
  // The module cache
  var installedModules = {}
  // The require function
  function __webpack_require__(moduleId) {
    // Check if module is in cache
    if (installedModules[moduleId]) {
      return installedModules[moduleId].exports
    }
    // Create a new module (and put it into the cache)
    var module = installedModules[moduleId] = {
      i: moduleId,
      l: false,
      exports: {}
    }
    // Execute the module function
    modules[moduleId].call(module.exports, module, module.exports, __webpack_require__)
    // Return the exports of the module
    return module.exports
  }
  // Load entry module and return exports
  return __webpack_require__(__webpack_require__.s = './src/index.js')
})({
  './src/a.js':
      (function (module, exports, __webpack_require__) {
        eval('let b = __webpack_require__("./src/base/b.js");\r\nmodule.exports = \'a\' + b;\r\n\n\n')
      }),
  './src/base/b.js':
      (function (module, exports) {
        eval('module.exports = \'b\';\r\n\n\n')
      }),
  './src/index.js':
      (function (module, exports, __webpack_require__) {
        eval('let str = __webpack_require__("./src/a.js");\r\nconsole.log(str)\r\n\r\n\n\n')
      })
})
分解这个代码片段
- 使用了一个立即执行函数,把我们的内容一些模块进行的源码和路径名的一些映射,文件内容通过一个函数进行包裹,分别传入三个变量
module,exports,__webpack_require__ - 对于源文件中使用了
require的代码片段,全部替换成了__webpack_require__
  './src/a.js': (function (module, exports, __webpack_require__) {
        eval('let b = __webpack_require__(/*! ./base/b.js */ "./src/base/b.js");\r\nmodule.exports = \'a\' + b;')
  }),
- 然后通过
modules参数传入到函数内部, 定义了一个缓存对象,用于缓存已经加载过后的模块installedModules - 实现了一个
__webpack_require__函数,接受一个模块id作为参数,返回了内部定义的变量module.exports
  // The module cache
  var installedModules = {}
  // The require function
  function __webpack_require__(moduleId) {
    // Check if module is in cache, 缓存后就直接返回
    if (installedModules[moduleId]) {
      return installedModules[moduleId].exports
    }
    // Create a new module (and put it into the cache)
    var module = installedModules[moduleId] = {
      i: moduleId,
      exports: {}
    }
    // Execute the module function
    modules[moduleId].call(module.exports, module, module.exports, __webpack_require__)
    // Return the exports of the module
    return module.exports
  }
  // Load entry module and return exports
  return __webpack_require__('./src/index.js')
- 传递我们的入口文件的
moduleId, 调用__webpack_require__函数,并返回值 - 本质上这个代码片段是这个意思
- 执行了自定义的函数
__webpack_require__并传入了一个入口文件./src/index.js - 在入口文件中发现依赖了其他模块(
"./src/a.js"),递归调用了__webpack_require__,并传入了依赖的路径"./src/a.js"(modules中的key) - 在
"./src/a.js"的代码中发现有依赖了"./src/base/b.js", 递归调用了__webpack_require__ - 最后返回了
__webpack_require__函数的返回值
- 执行了自定义的函数
实现简单的webpack
我们创建2个目录,一个作为webpack的实现(webpack-write),一个作为前端开发过程中使用的webpack(webpack-dev), 基于这2个目录我们开始实现一个简单的webpack
连接2个项目
webpack-write
webpack-write
├── bin
	├── hcc-webpack.js
└── package.json

// package.json 中
  "bin": {
    "hcc-webpack": "./bin/hcc-webpack.js"
  },

// hcc-webpack.js
console.log('hcc-webpack')
我们执行npm link把执行文件链接到本地的npm库中
$ npm link
// C:\Users\chucaihuang\AppData\Roaming\npm\node_modules\webpack-write -> D:\study\hcc-webpack\blog\webpack-write
webpack-dev
webpack-dev/src
├── a.js
├── base
	├── b.js
└── index.js
├── webpack.config.js
// webpack.config.js
const path = require("path");
module.exports = {
  entry: "./src/index.js",
  output: {
    filename: "bundle.js",
    path: path.resolve(__dirname, "dist"),
  }
};
我们在开发环境执行npm link webpack-write上面的
D:\study\hcc-webpack\blog\webpack-dev\node_modules\webpack-write ->
C:\Users\chucaihuang\AppData\Roaming\npm\node_modules\webpack-write ->
D:\study\hcc-webpack\blog\webpack-write
然后我们执行npx hcc-webpack就可以实时的同步我们在webpack-write里面的更新内容了,这样就可以方便我们联调自己写的webpack是否好用。
整体需求分析和代码实现
基于上面的打包后的代码分析,我们需要确定几个点
- 模块的入口文件id
moduleId - 文件的路径和文件的内容的映射
- 根据模板生成打包文件
1. hcc-webpack.js文件
我们在webpack-write中bin文件夹中的hcc-webpack.js需要做几件事
- 获取用户的
webpack.config.js的配置选项 - webpack文档中
compiler实例贯穿整个打包过程,所有我们需要新建一个compiler实例 - 开始进行编译
// bin/hcc-webpack.js文件

#!/usr/bin/env node
// console.log('hcc-webpack-3')

const path = require('path')
// 1. 获取webpack-dev中的配置
let config = require(path.resolve('webpack.config.js'))

// 创建Compile实例
let Compiler = require('../lib/Compiler.js');
let compiler = new Compiler(config)

// 开始打包编译
compiler.run()
2. lib文件下的Compiler.js文件
- 我们需要获取到入口标识和文件的内容,从而实现生产依赖的文件和文件内容的映射
// 获取入口文件的内容
class Compiler {
  constructor(config = {}) {
    // 存放配置
    this.config = config
    // 确定入口文件
    this.entryId = config.entry
    // 需要通过绝对路径获取文件资源,需要获取到工作路径
    this.root = process.cwd()
  }
  getSource(modulePath) {
    let source = fs.readFileSync(modulePath, {
      encoding: 'utf8'
    })
    return source
  }
  buildModuleSource(modulePath) {
    let source = this.getSource(modulePath)
    // console.log(source)
  }
  run() {
    // console.log('运行', this.config)
    // console.log('运行', this.entryId)
    // 1. 获取入口文件的内容,确定文件的依赖
    this.buildModuleSource(path.join(this.root, this.entryId))
  }
}
- 处理源码的内容
- 对获取到的源码进行改造,把
require换成之后自己实现的__webpack_require__,并生成入口文件的依赖,我们通过ast语法树进行源码修改- babylon 主要是把源码 转换成ast
- @babel/traverse 需要遍历到对应的节点
- @babel/types 把遍历的节点替换
- @babel/generator 需要把替换的结果生成
buildModuleSource(modulePath) {
    let source = this.getSource(modulePath)
 +  let { sourceCode } = this.parse(source)
    console.log(sourceCode)
}

parse(source) {
  let ast = babylon.parse(source)
  traverse(ast, {
    CallExpression(p) { // 函数调用 // a()  require()
      let { node } = p // 获取到调用节点
      if (node.callee.name === 'require') {
        node.callee.name = '__webpack_require__'  // 替换require
      }
    }
  })
  let sourceCode = generator(ast).code
  return {
    sourceCode
  }
}
- 我们需要获取到
index.js的依赖项,然后递归的进行require的替换 - 我们从打包后的内容可以看出,我们在
index.js中使用的require('./a.js'),但是在modules中的key变成了./src/a.js, 所有我们需要做一些文件路径的处理,基于src这个目录来处理依赖项的key
 buildModuleSource(modulePath) {
     let source = this.getSource(modulePath)
-    let { sourceCode } = this.parse(source)
+    // 获取基于src的相对目录
+    // 模块ID  相对路径 = modulePath - this.root  ->  ./src/index.js
+   let moduleName = './' + path.relative(this.root, modulePath)
+   let { sourceCode, dependencies } = this.parse(source, path.dirname(moduleName)) // ./src
    console.log(sourceCode)
}

parse(source) {
   let ast = babylon.parse(source)
+  let dependencies = [] // 文件的依赖
   traverse(ast, {
     CallExpression(p) { // 函数调用 // a()  require()
       let { node } = p // 获取到调用节点
       if (node.callee.name === 'require') {
         node.callee.name = '__webpack_require__'  // 替换require
+         let moduleName = node.arguments[0].value  // 获取到函数调用的参数,里面的路径'./a.js'
+         moduleName = './' + path.join(parentDir, moduleName)// 把./a.js 修改成  ./src/a.js  基于src,方便之后通过this.root获取绝对位置
          // console.log('1', moduleName, parentDir)
+         dependencies.push(moduleName)
+         node.arguments = [types.stringLiteral(moduleName)];
       }
     }
   })
   let sourceCode = generator(ast).code
   return {
     sourceCode,
+    dependencies
   }
}
- 递归获取模块依赖
modules
 buildModuleSource(modulePath) {
   let source = this.getSource(modulePath)
   let { sourceCode } = this.parse(source)
   let moduleName = './' + path.relative(this.root, modulePath)
   let { sourceCode, dependencies } = this.parse(source, path.dirname(moduleName)) // ./src

+   // 把相对路径和模块中的内容 对应起来
+   this.modules[moduleName] = sourceCode
+   // 递归获取模块的依赖
+   if (dependencies && dependencies.length) {
+      dependencies.forEach(modulePath => {
+        console.log(modulePath)
+        this.buildModuleSource(path.join(this.root, modulePath))
+      })
+   }
+   console.log(this.modules)
}
总结
上面的三点,我们已经完成了2点了,接下来只需要根据模板发送打包后的文件到指定位置了
1. 模块的入口文件id moduleId
2. 文件的路径和文件的内容的映射
- 根据模板生成打包文件
- 增加模板的内容
main.ejs, 使用ejs来生产打包后的文件
# /lib/main.ejs (function (modules) { var installedModules = {}; function __webpack_require__(moduleId) { if (installedModules[moduleId]) { return installedModules[moduleId].exports; } var module = installedModules[moduleId] = { i: moduleId, l: false, exports: {} }; modules[moduleId].call(module.exports, module, module.exports, __webpack_require__); module.l = true; return module.exports; } return __webpack_require__(__webpack_require__.s = '<%-entryId%>'); }) ({ <%for(let key in modules) {%> '<%-key%>': (function (module, exports, __webpack_require__) { eval(`<%-modules[key] %>`); }), <%}%> });- 发送文件
run() { this.buildModuleSource(path.join(this.root, this.entryId), true) // 发射一个文件,打包后的文件 + this.emitFile(); } emitFile() { let dist = path.join(this.config.output.path, this.config.output.filename); let templateStr = this.getSource(path.join(__dirname, 'main.ejs')); let code = ejs.render(templateStr, { entryId: this.entryId, modules: this.modules }); // 资源中,路径对应的代码 this.assets = {}; this.assets[dist] = code; if (!fs.existsSync(this.config.output.path)){ fs.mkdirSync(this.config.output.path); } fs.writeFileSync(dist, this.assets[dist], { flag: 'a+' }); } - 增加模板的内容
打包后发现文件的modules下面的文件名对应不了,由于linux和windows下面的文件分隔符不太一样,所以我们需要修改一下entryId, 使得入口文件可以对应上modules下面的key,从而获取到源码并递归依赖
+  buildModuleSource(modulePath, isEntry = false) {
    let source = this.getSource(modulePath)
    // 获取基于src的相对目录
    // 模块ID  相对路径 = modulePath - this.root  ->  ./src/index.js
    let moduleName = './' + path.relative(this.root, modulePath)
+  console.log(moduleName)
+  if (isEntry) {
+     this.entryId = moduleName;
    }

    let { sourceCode, dependencies } = this.parse(source, path.dirname(moduleName)) // ./src

    // 把相对路径和模块中的内容 对应起来
    this.modules[moduleName] = sourceCode

    // 递归获取模块的依赖
    if (dependencies && dependencies.length) {
      dependencies.forEach(modulePath => {
        this.buildModuleSource(path.join(this.root, modulePath))
      })
    }
  }
run() {
  // 1. 获取入口文件的内容,确定文件的依赖
+  this.buildModuleSource(path.join(this.root, this.entryId), true)
  // 发射一个文件,打包后的文件
  this.emitFile();
}
最后
webpack5 中打包机制没有打的变动,打包后就是入口文件剔除了模块依赖中
(() => { // webpackBootstrap
  var __webpack_modules__ = ({
    './src/a.js':
        ((module, __unused_webpack_exports, __webpack_require__) => {

          eval('let b = __webpack_require__(/*! ./base/b.js */ "./src/base/b.js");\r\nmodule.exports = \'a\' + b;\r\n\n\n')

        }),
    './src/base/b.js':
        ((module) => {
          eval('module.exports = \'b\';\r\n\n\n')
        })

  })
  var __webpack_module_cache__ = {}

  // The require function
  function __webpack_require__(moduleId) {
    // Check if module is in cache
    if (__webpack_module_cache__[moduleId]) {
      return __webpack_module_cache__[moduleId].exports
    }
    // Create a new module (and put it into the cache)
    var module = __webpack_module_cache__[moduleId] = {
      // no module.id needed
      // no module.loaded needed
      exports: {}
    }

    // Execute the module function
    __webpack_modules__[moduleId](module, module.exports, __webpack_require__)

    // Return the exports of the module
    return module.exports
  }
  (() => {
    eval('let str = __webpack_require__(/*! ./a.js */ "./src/a.js");\r\nconsole.log(str)\r\n\n\n')
  })()
})()
由于篇幅太长了,下篇我们基于这篇文章讲解一些webpack的loader 和 webpack的plugins机制和原理。
常见问题FAQ
- 免费下载或者VIP会员专享资源能否直接商用?
- 本站所有资源版权均属于原作者所有,这里所提供资源均只能用于参考学习用,请勿直接商用。若由于商用引起版权纠纷,一切责任均由使用者承担。更多说明请参考 VIP介绍。
- 提示下载完但解压或打开不了?
- 找不到素材资源介绍文章里的示例图片?
- 模板不会安装或需要功能定制以及二次开发?


发表评论
还没有评论,快来抢沙发吧!